Do you have a closet full of cute dresses, tops, jeans, stilettos, and purses that you don’t wear anymore? I think it’s safe to say that we all do! If you don’t want to donate it all to a thrift store that’s overflowing with bags of clothes, you can try selling your items online to people around the country! There are so many apps and platforms today that allow you to turn your items into actual cash.
I’m going to break it down for you, as selling online sometimes has a stigma of being over-complicated.
How do you get paid?
Every single platform gives you the option for direct deposit into your bank account, or even sometimes PayPal. Depending on the website or app you use, funds are either deposited right away, or upon delivery to the buyer.
How do you ship?
This is the biggest mental deterrent people have when it comes to selling items online. The good news is, it’s easier than you think! Every online selling platform provides you with the shipping label to print right off your computer. And you get the option to charge the buyer for shipping, or to offer free shipping.
Regardless, the shipping label is typically emailed to you, ready for you to print. You don’t have to wait in line at a post office or try to figure out which is the best shipping carrier to choose from. Websites such as eBay or Facebook Marketplace will intuitively guide you through that.
Do these selling platforms take a fee?
Yes, they do. These websites have to maintain themselves financially, but they do offer customer service for the buyer and seller, and to make it appealing to use them for reselling. For example, if your item that you sold gets lost in the mail, some apps will still release your funds to you. Or if the buyer tries to return the item you sold, or claims what you sold them wasn’t as described, most of these platforms will look at both sides of the story here–so to speak. So, yes; their fees may seem steep, but they have the seller’s back!
What are the steps to selling the items?
First, make sure what you are going to sell is in good, clean condition. Items with stains or holes will be hard to sell. Second, do your research on your item. Check to see what other people are charging for the same or similar item, and how much the same item recently has been selling for. You don’t want to under-price yourself when you could get a good amount of money for something, nor do you want to overprice your item and then have it sit for months and not sell.
What lighting should you use?
Find a spot in your house with the best lighting! Natural sunlight works best, as it helps eliminate any shadows.
PRO TIP: I use a spot on my staircase in the foyer where a picture is normally hung. I remove the picture, hang up my item with a hanger, and the photo comes out crisp!
How should you be photographing your item?
When taking a picture of your item, find a clean, clear, and plain background. Use a plain wall if you’re able to (it’s fine if you have a colored wall!). You can also simply take the photo on your floor, as the background is typically plain. Your picture will be the psychological selling point that will draw your buyer to you and stop them from scrolling by. Keep that in mind.
PRO TIP: Take pictures of the front, back, any details, size, and brand tag.
How do you list your item?
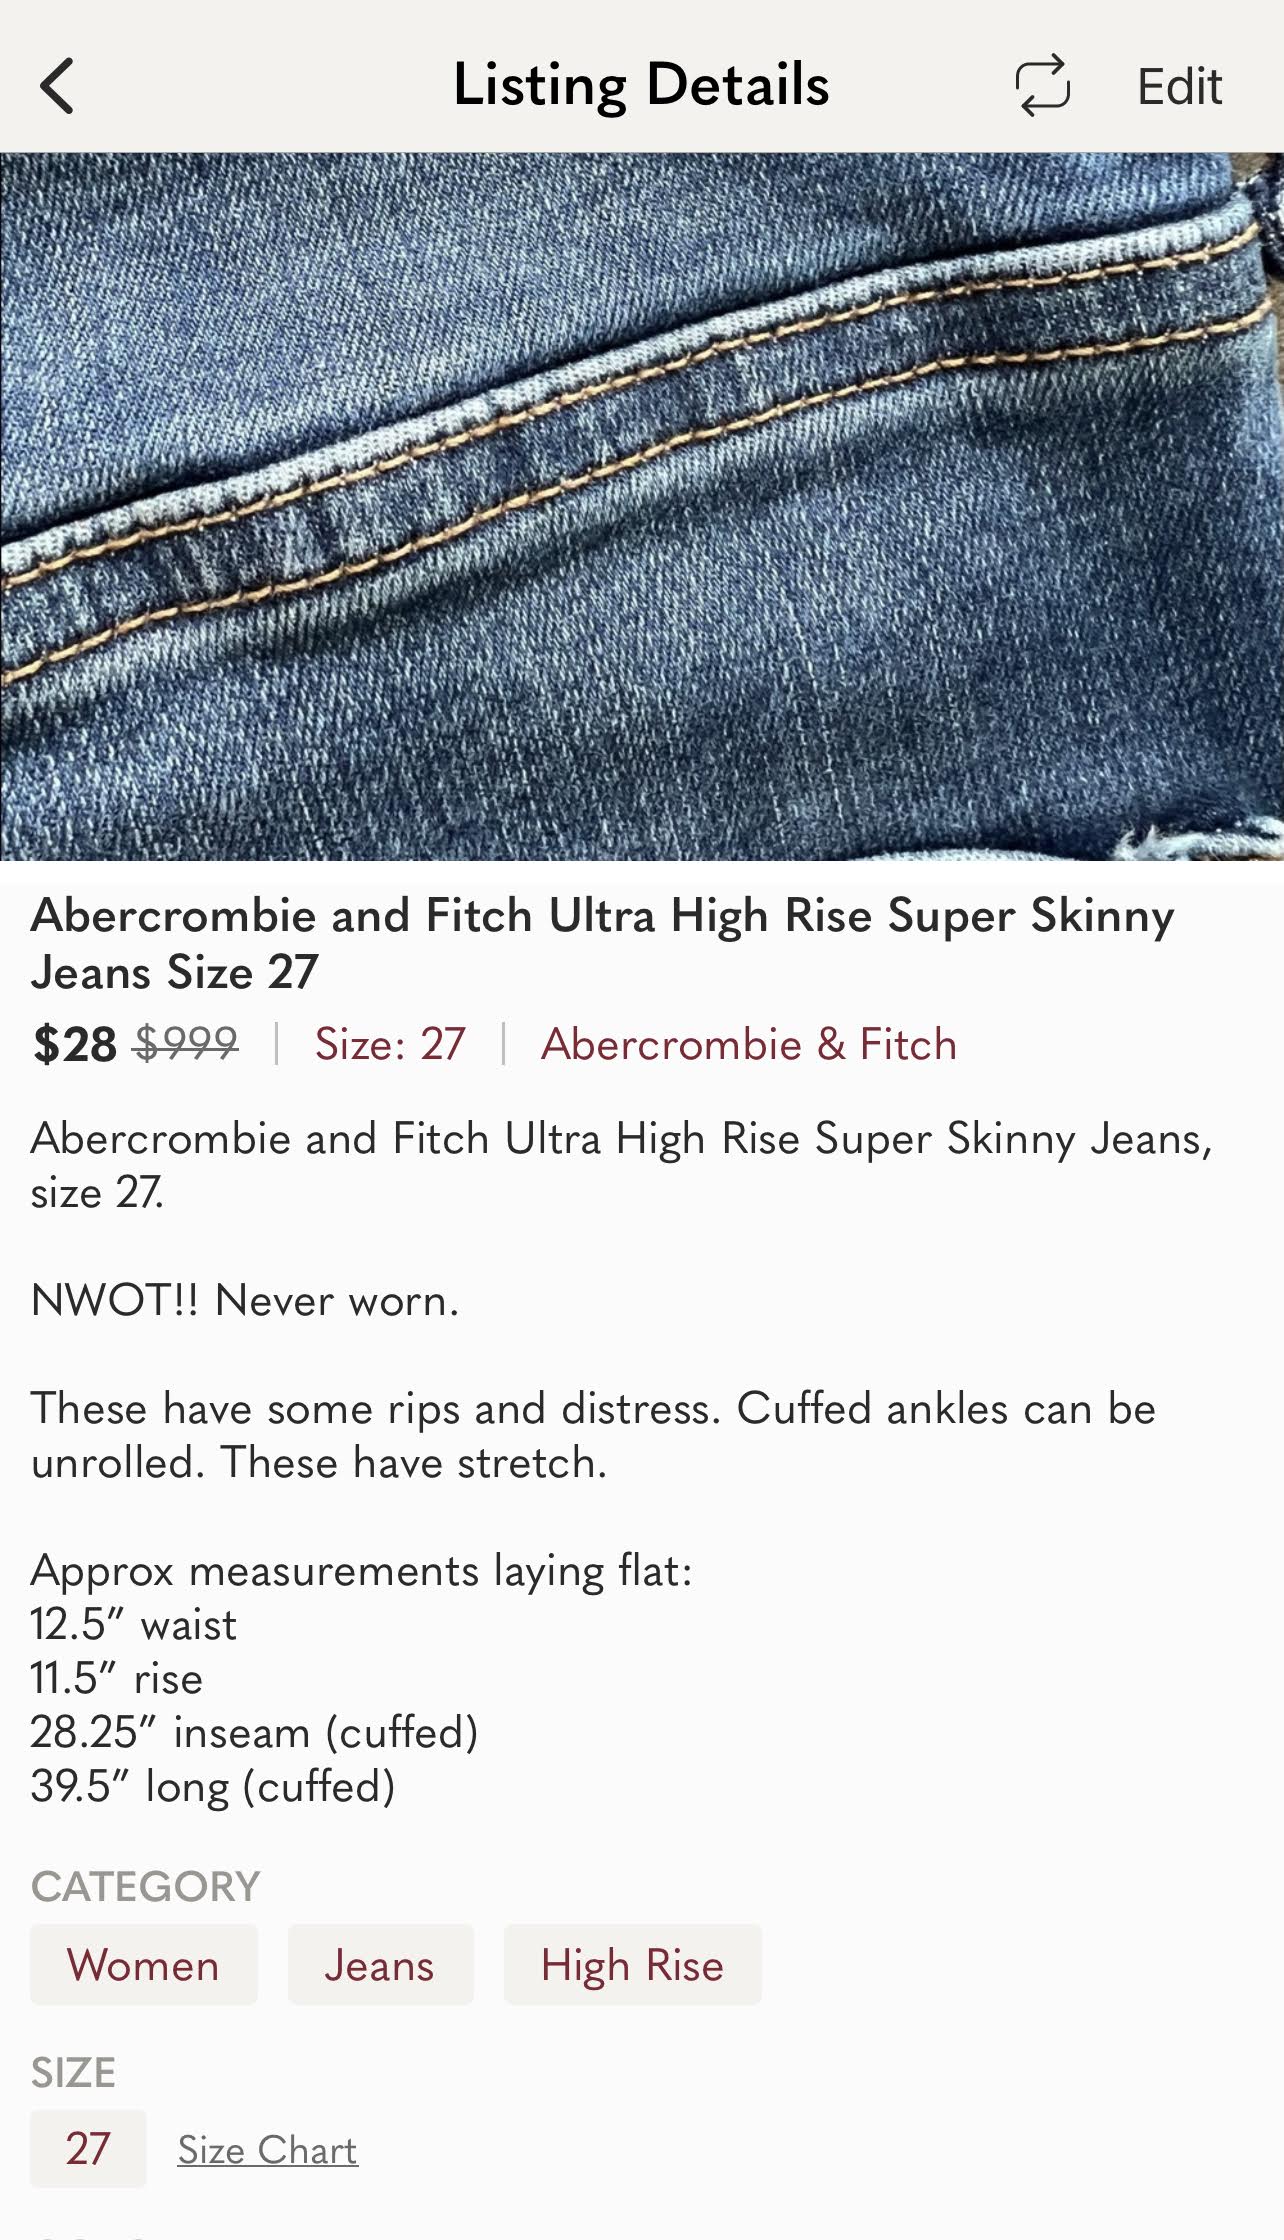
Once your pictures have been taken, it’s time to list your item! For the title, you need to make it descriptive. Include the brand, style type, item, color, and size. For example: “American Eagle High Rise Jegging Jeans Size 8.” Simply typing “cute jeans” will not bring your item up in search results.
Next, it’s time to write your description. Include all details of the item. Try to use keywords in the description that you would use to search for this same item. This is where you can add sentences stating “cute jeans,” for example. Along with the brand, style, item, and size, it’s recommended that you also include:
- condition
- any features
- material
- measurements (pit to pit and length)
PRO TIP: When writing your description, make sure you cover any questions the buyer may have about your item so that they don’t need to ask you or move on to another person’s listing.
After writing your description, complete your listing by filling out the options below and set your price!
What happens when you finally make a sale?
*Cue the happy dance!* When you finally make a sale, the selling platform or app will send you an email or you will get a notification on your phone. Now it’s time to pack up your order, print your shipping label, and take it to the post office or your mailbox!
PRO TIP: Wrap your item in tissue paper and include a small thank you note. It makes your buyer feel like they are purchasing something special, rather than JUST a secondhand item.
And there you have it! Reselling websites and apps are great tools for selling clothing, shoes, and accessories that you no longer want anymore. Think of it like this: the money you can make reselling your old items can be reinvested into new clothes or shoes!


