

So you bought yourself a DSLR camera with the hopes of capturing crisper and more professional looking images. You researched different models, found the right price, and now you have it– sitting in your closet. As a mom with many friends who also have cameras collecting dust, I’m here to tell you it’s time to stop fearing your fancy camera and USE IT!
I’ve been using my own entry level DSLR camera for years, and when I first bought it, I knew as much as anyone else: nothing. I started with reading tutorials online and watching YouTube videos on making the most of what my camera can do. I understand that researching articles as a beginner can be incredibly daunting, so I wanted to share a guide with some simple tips that helped me.
Photography Basics
First and foremost, getting a broad idea of the basic principles of photography is important. There’s no reason to become a full expert on the topic, but having an understanding of how aperture, ISO, and shutter speed work will be a big help in the long run. Unless you’re using your camera only in auto mode, you’ll likely need to make adjustments of one or more of these settings to get the photos you want.
Aperture
Aperture determines how much light enters the camera and your depth of field (the range of objects in focus). Aperture settings work opposite of how you’d expect them. A lower aperture will give you a larger depth of field while a higher aperture will give you a more shallow depth of field.
ISO
ISO determines your camera’s sensitivity to light. Photos taken in bright light require lower ISO settings (100 or 200) while images taken in dark light require higher settings (800 or 1600). When making adjustments to ISO on many cameras, there are photo examples of different light to aid you in selecting properly.
Shutter Speed
Shutter Speed determines how long light will have to enter the camera. Adjusting shutter speed will also affect the way movement in your images are recorded. Fast shutter speeds can freeze images like falling water or children running while slow shutter speeds will blur motion.
Camera Modes
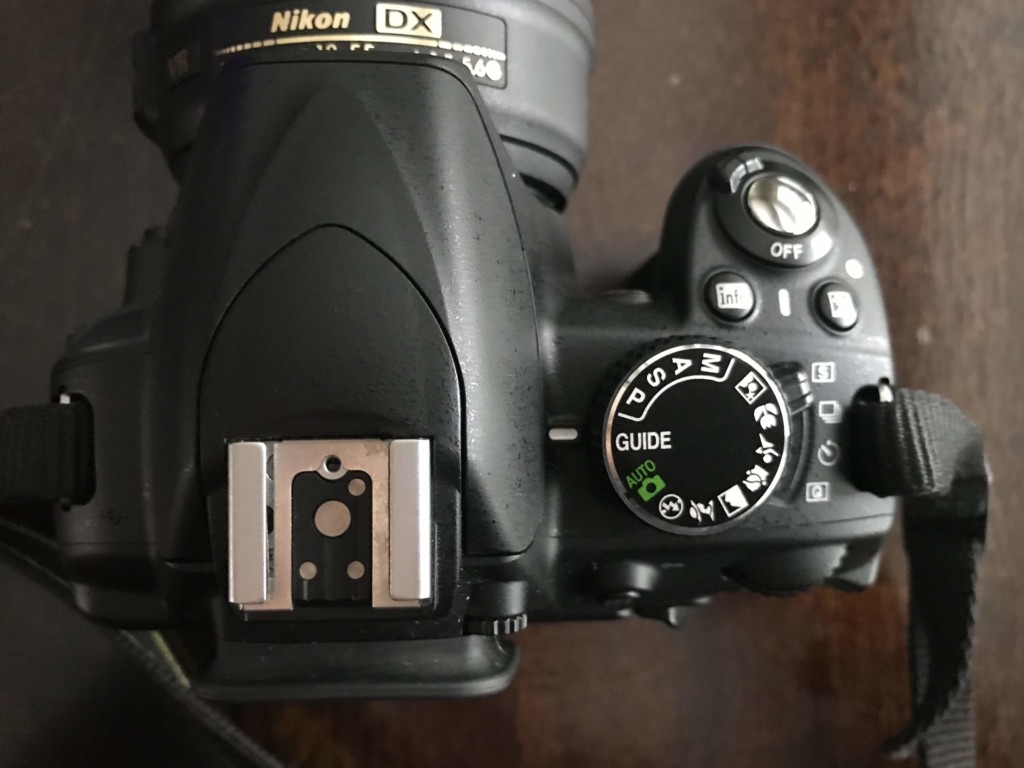
If you search for beginners guides to using a DSLR camera, you’re most often bombarded by photographers pressuring the importance of learning to use your camera in manual. For someone hoping to take their photography habits beyond just a hobby, learning to shoot in manual is ideal. For a parent just hoping to capture some quality images of their kids? Not really. Below are a few of the modes I use most often on my own camera:
Guide
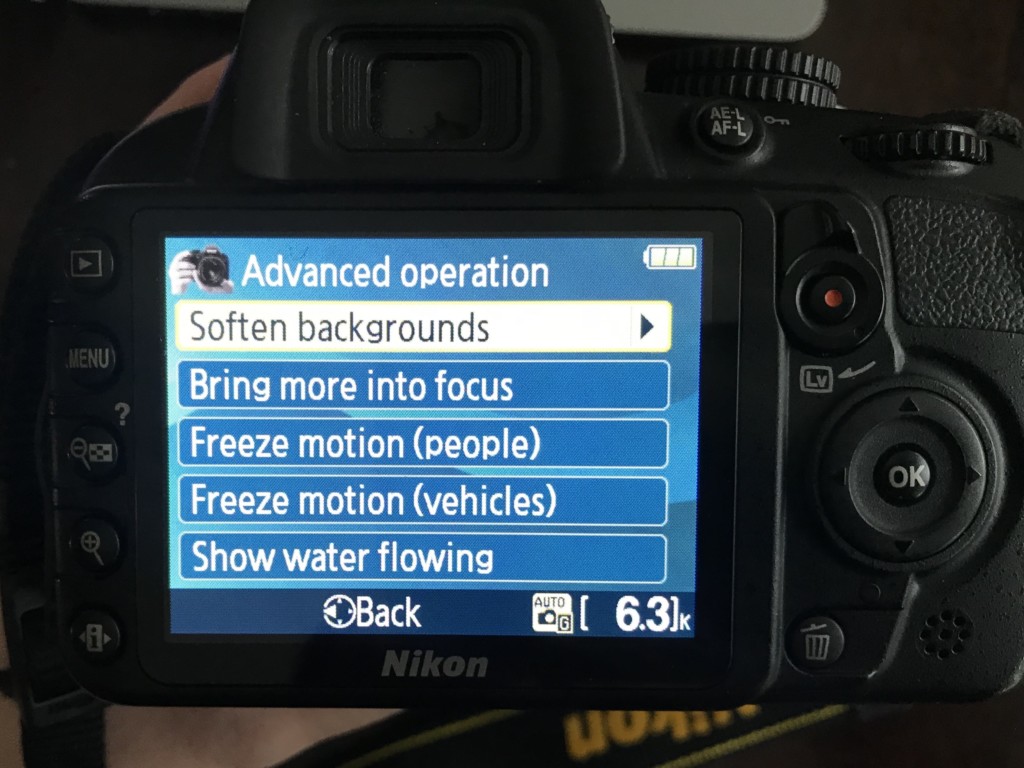
If your camera has a guide mode, I suggest starting there. The guide will assist you in getting the photo you want to achieve by offering you options to click through and providing the camera with suggested settings. Softening backgrounds, freezing subjects, and adjusting focus are just some of the options my Nikon offers.
Sport
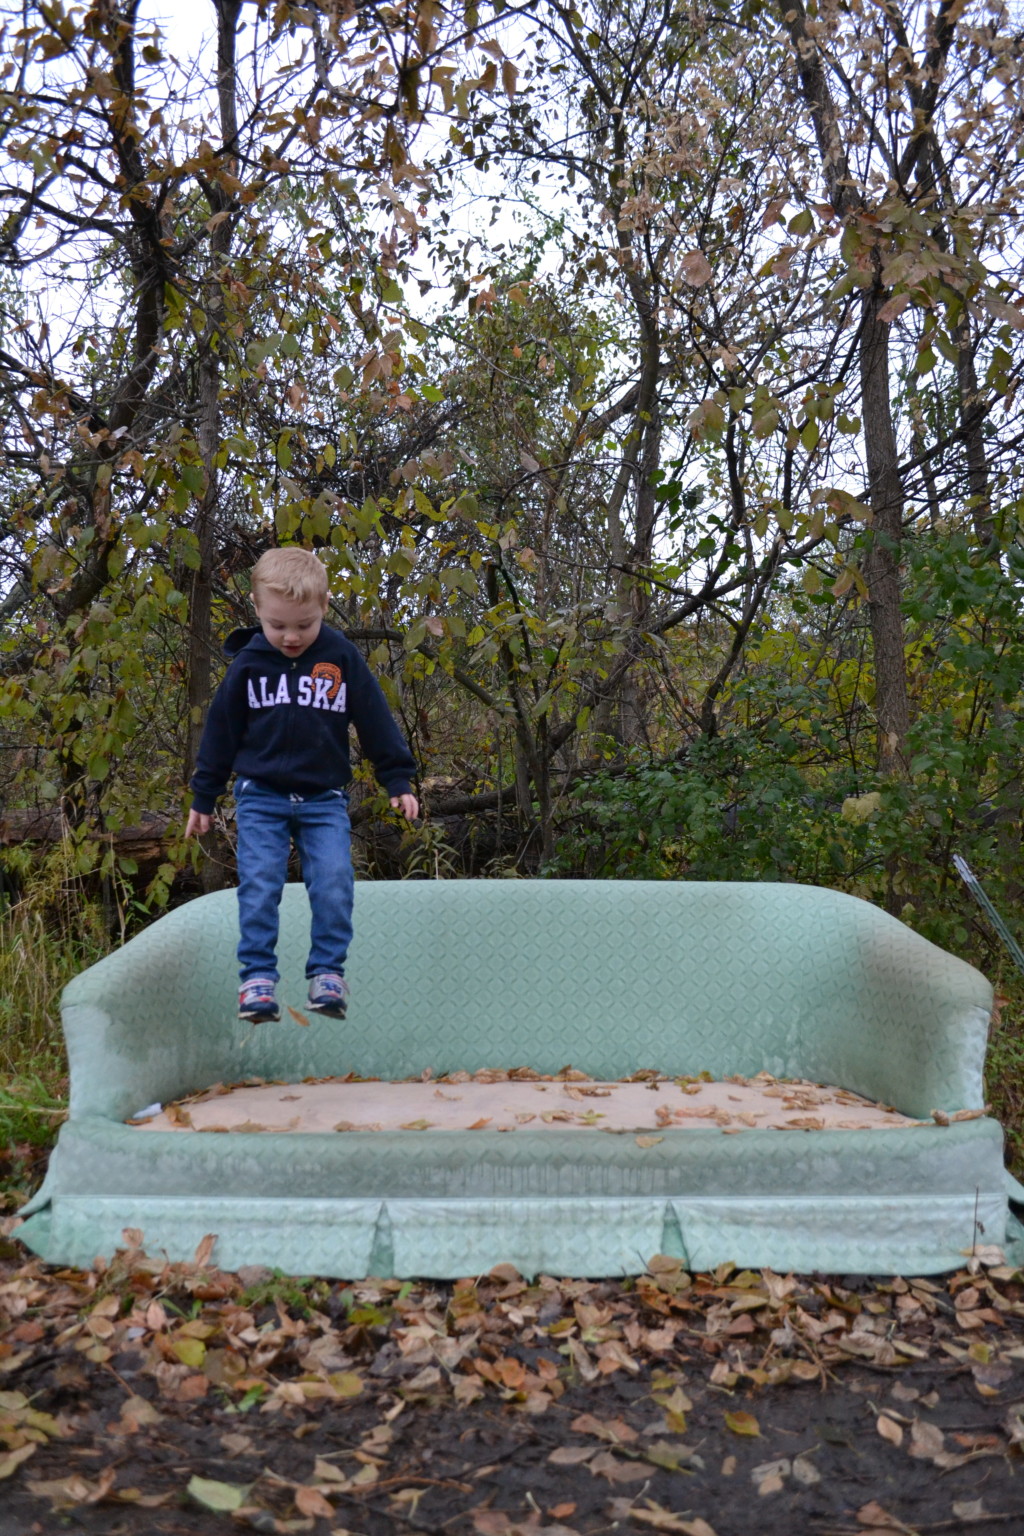
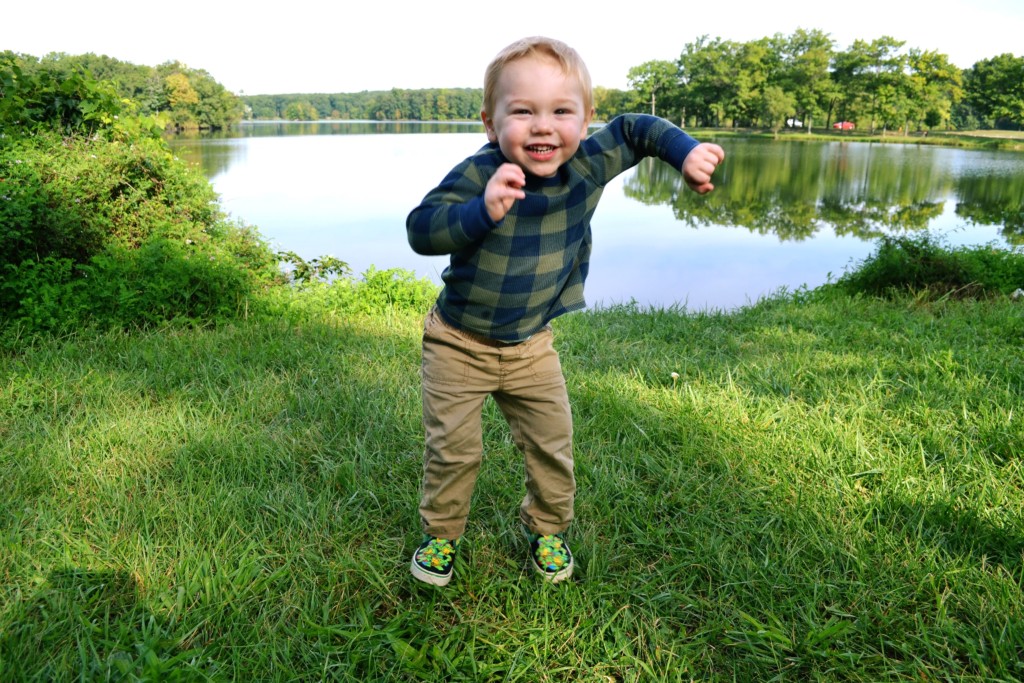
In addition to Guide, my camera offers a handful of different “scene” modes with settings that make it easy for you to pick up and start shooting. My favorite mode to capture active photos of my kids with is Sport. Sport mode uses a fast shutter speed and autofocus to freeze objects in place. While I may not always get a dramatic depth of field when using sport mode, I know I don’t run the risk of ruining a perfect shot with a lot of blur.
Aperture Priority

If you ever find yourself scrolling Instagram marveling at the beauty of a photo with more depth, it’s probably because the photo was taken with a low aperture. Using this mode will soften backgrounds or objects in front to make your subject the clear focus of the image. Unlike with the Guide or other “scene” modes, Aperture mode requires me to make additional adjustments to the camera settings myself.
Lighting
When I first bought my camera, I would use it on the “Auto” mode almost exclusively. I quickly discovered that the main downside to using the Auto mode is that it almost always turned the flash on. Using your camera’s flash (or any artificial light) will create flat and washed-out images. My biggest tip for taking photos of ANY kind, is to use natural light as often as possible.
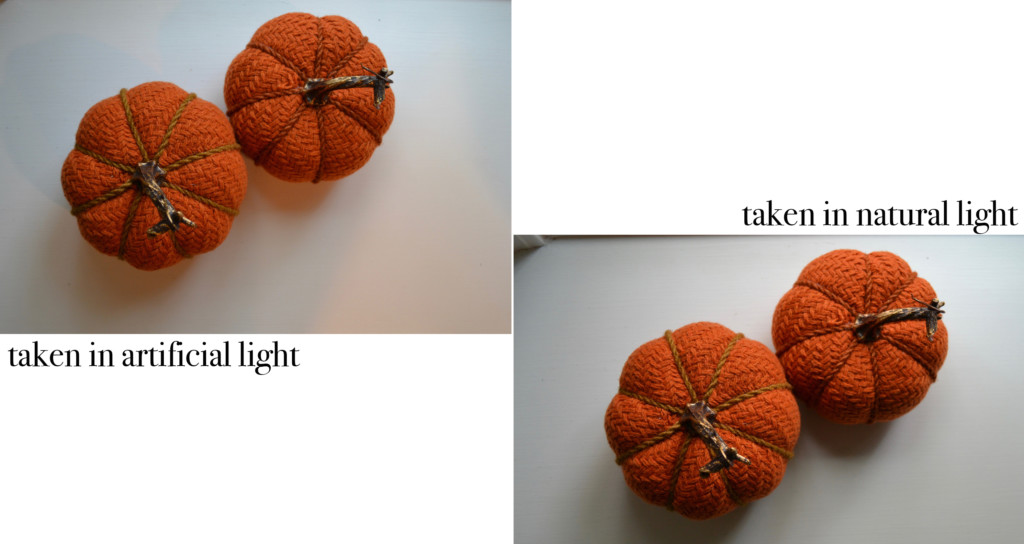
For indoor photography, I like to take advantage of window light at different times of the day. Some rooms get better light in the morning and some in the evening. Once you familiarize yourself with the way your camera’s settings work, you’ll begin to notice better light opportunities.

Outdoor photos always look best when taken in indirect sunlight. Taking a photo with the light directly on your subject will create harsh shadows (not to mention squinty little eyes). Finding good light at anytime during the day can be a challenge at first. Don’t be afraid to experiment with different angles and shaded areas until you find what works best for you.
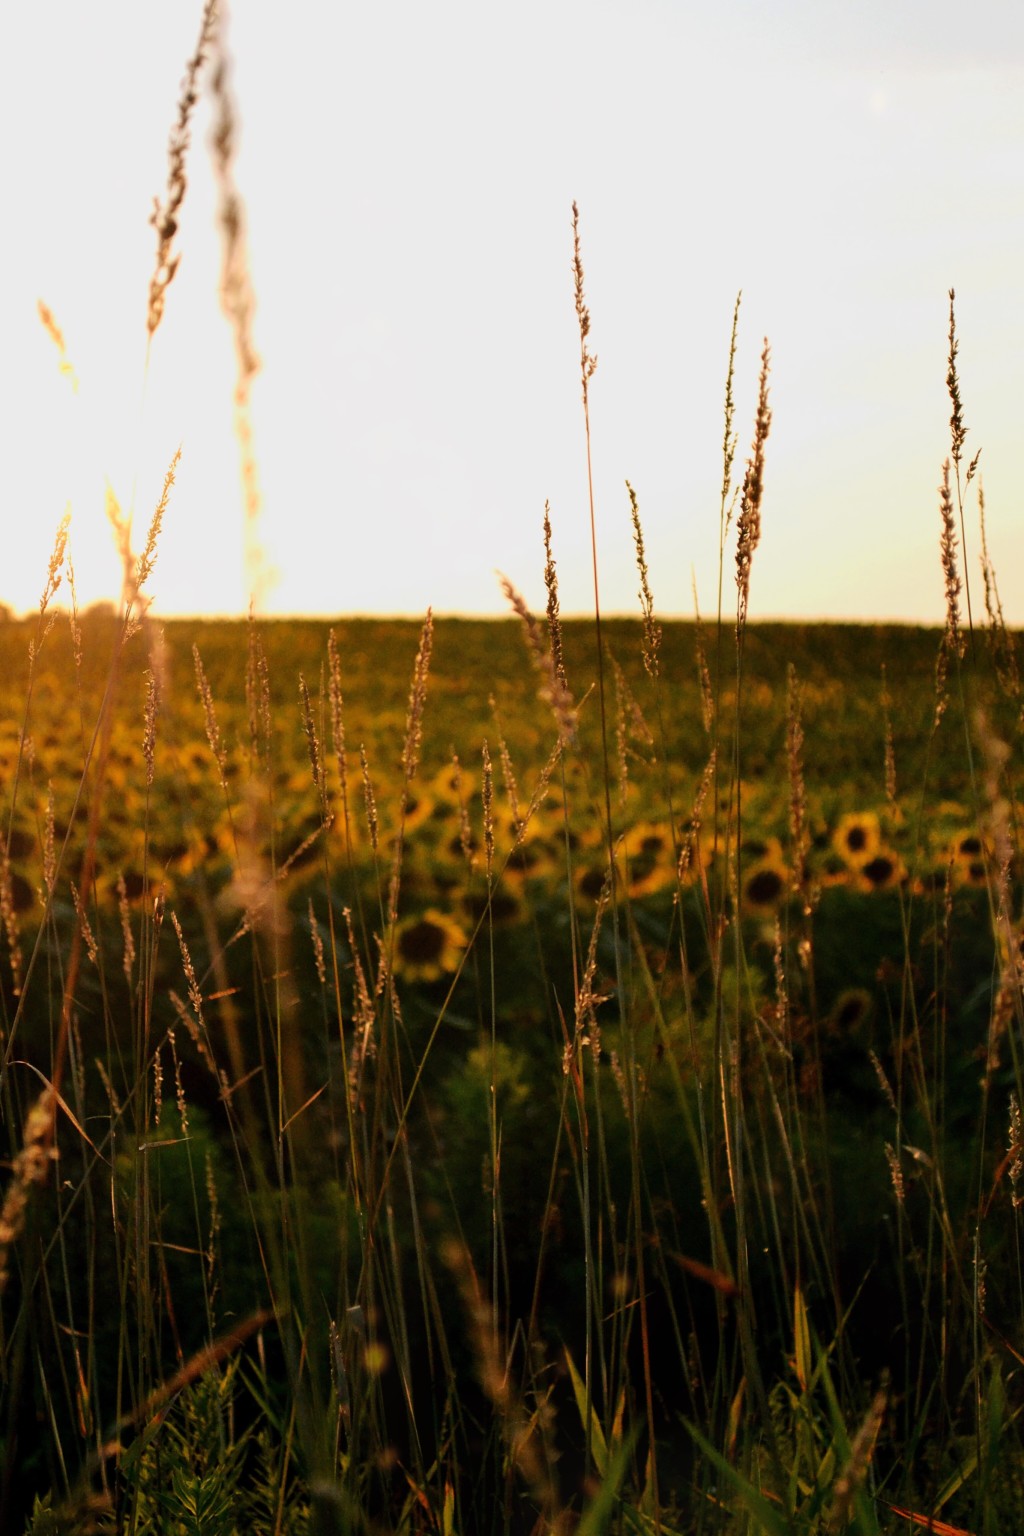
My favorite time of the day to capture outdoor images is during “Golden Hour.” Golden Hour takes place twice a day: the hour the sun rises and the hour it sets. If you get the timing right, it can be easy to capture some seriously beautiful images.
Take multiples, experiment, and, when in doubt, BRING YOUR CAMERA
You’ll learn early-on that you can never take too many photos. Try different angles or settings, and familiarize yourself with new camera modes. The simplest DSLR is capable of doing some amazing things if you’re willing to take the time to learn.
And finally, if you’re ever doubting yourself about bringing the camera, my answer is always the same– bring it. You can read as many online guides as you want, but you’ll never get more comfortable with your fancy camera unless you USE IT!


